Thursday, September 8, 2011

Layout Construction–July & August 2011

Scenery in the Denton Area
Now that I have done a little experimenting with the “Grass-a-nator”, it was time to cover a larger area. The photos below show the results of going grass crazy. I attempted to simulate a track that receives very little maintenance and has become over grown with grass.

IMG_0036IMG_0039

IMG_0014IMG_0011

IMG_0006

Steven’s Repair Shop
Created a little scene around Steven’s repair shop in Denton. I added a few trees, some bushes, vehicles and a few figures. There is still a lot to do with some specific details, but you can get the general idea of finished scene.

IMG_0026IMG_0041

IMG_0029IMG_0033

IMG_0031

Additional Structures for Lewistown
I completed the oil loading platform for the Conoco oil depot. There were oil fields north of Lewistown and a refinery was built there in the 1920’s. The refinery lasted until the 1950’s when production was moved Great Falls. A branch line from Lewistown to Winifred at one time saw multiple trains of oil per day. The oil tanks in the photo below have been printed on paper and will be attached to the backdrop. While not an exact representation of the original, it will work for a representation and an industry to switch cars for.

Lewistown Yard-Brewery Flats
Original photographer unknown.

IMG_0016

Lewistown Freight Depot
Modeling the Milwaukee’s freight depot in Lewistown was a challenge. I have not been able to find many photos of the original depot. It was time to get a little creative to build this structure. There was nothing commercially available that would work to recreate the depot. I used Walthers building sections to piece together an acceptable model. All that needs to be done is the final weathering and signage added to the building.

1981-BN immediately took Lewistown
Original photographer John Jones from the MILW Yahoo Group.

IMG_0049

Denton Grain Elevator
Finally completed some additional details to the Montana Elevator in Denton. Most grain bins have catwalks for workers to service the auger systems that move grain to additional bin storage. I scratch built the catwalk from wire and plastic channels. Now the last piece will be stairs coming from the side window down the roof for access to the catwalk. After that is completed the final weathering and signage will be added.

IMG_0042

Ballasting Lewistown Yard
I decided it was time to complete all the track ballasting on the lower level. This really gives this area a more completed look. Ballasting is a long and tedious process, but the final result is very satisfying. Prior to ballasting the rails are painted a rusty brown color and the ties are painted various shades of gray to give a nice weathered look to the track.

IMG_0021IMG_0024

Sunday, July 24, 2011

Special Video Post – July 2011


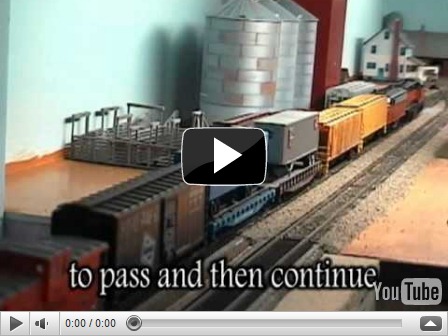
Follow along as we chase Milwaukee Road train #901 from Geraldine to Lewistown, Montana.

Following Milwaukee Road Train #901 from Geraldine to Lewistown

Bloopers from the video above

Oops!

Monday, July 11, 2011

Layout Construction – June 2011

Major Changes in Denton
June has been a busy month. I added dirt as the first layer of scenery to this area. Grass, brush and trees will be added in consecutive layers to complete the scenery.

Creating Wolf Creek
The biggest challenge was to add water to the creek. Time to try a new technique, at least new to me. This began with gathering very small rocks for the creek bed. I then added larger rocks for the sides of the creek along with sand to represent the bank. I then painted the the creek bed with a dark green paint wash to give it some depth and color. Finally came time to pour the water. I used EnviroTex purchased from Michaels.  EnviroTex is a two part epoxy that you mix and pour. After about 72 hours it dries to a hard, smooth, glossy surface. To simulate moving water, I painted the surface with acrylic gloss medium which dries clear and will give you the appearance of ripples. to emphasize the ripples you then use white paint to give it the appearance of frothing water. Overall, I am very happy with my first attempt at this technique.

IMG_0067IMG_0069

IMG_0074

Static grass
To create a more realistic grass, I built a static grass machine from a battery operated fly swatter and a metal sifter. The “Grass-a-nator” contains an ion generator that creates a static charge between it and wet surface of the layout. To use the “Grass-a-nator” you apply paint or a water/glue mixture to the layout surface. A small metal pin that is connected to the “Grass-a-nator” is pushed into the wet surface. The “Grass-a-nator’s” screen is then loaded with small colored fibers called static grass. You hold the “Grass-a-nator” close to the surface and shake gently. The fibers fall to the wet surface and stand up because of the static created by the “Grass-a-nator”. The effect is very realistic.

IMG_0098IMG_0096

IMG_0077IMG_0078

New Building Construction
Two new building were built for the Denton area. These are wood craftsman kits. The first is a chicken coop for the farm scene. The other building is a small house that is common for farm communities. On the house, I created curtains on the computer and added them to the windows.

IMG_0083IMG_0084

IMG_0087

Dirt Roads
I tried a new (again, new to me) technique for making dirt roads. After gluing down a layer dirt for the main scenery layer, you rube the dirt with a stiff brush or as I found out, a finger to smooth the dirt layer. Repeatedly rubbing the dirt changes the color and the surface of the dirt. Wow, just like in real life. Now that really is art imitating life.

IMG_0089IMG_0091

Tuesday, June 7, 2011

Layout Construction - May 2011

More Work on Denton
This month included more work in the Denton area of  the layout. Work completed included painting the ground with an earth colored paint, ballasting the tracks and adding roads with crossings.

IMG_0008IMG_0020

IMG_0001IMG_0013

IMG_0027IMG_0025

New Buildings and Weathering
The newest structure for Denton is “Design Preservation Models Shultz’s Garage” that I purchased at the train show in January.  I added a metal roof for variety. This structure will be an automotive/farm implement repair business. Additional details like old cars and junk will be added after the scenery is completed. The stock yards received a paint job to simulate weathered wood. I tested a technique using chalk to simulate rust on one of the silos. The same technique was used on the barn.

IMG_0003IMG_0005

IMG_0010IMG_0015

IMG_0012IMG_0023

Friday, May 6, 2011

Layout Construction–April 2011

Continued Work on Denton
I have continued working on the scenery in the Denton area. This time I added a base board for the roads and some building in the area. The base board is 1/4” foam core. Using the foam core will bring the level of the road up to the same height as the track. In the first photo you can see an overall view east end of Denton showing a major road crossing and elevated areas for a gas station, repair shop and local watering hole. The second photo shows closer view of the crossing with inserts between tracks for the road surface. This road will be a paved two lane road.

IMG_0412IMG_0413

In this view, I have added a small country crossing to a local farm house. This will be a one lane dirt road. I also assembled a concrete silo to help hide the squared corner of the back drop.

IMG_0411IMG_0410

Operations Planning
Most of the month was spent working on a program to enhance the operating scheme of the layout. I came across a freeware program from the Model Railroad Hobbyist forum. The program is called “Easy Model Railroad Inventory”. You can check out Bob Langer’s website here. This program allows you to inventory all of your rolling stock, locomotives, buildings, library and much more. This is a very intensive program. As a benefit from inventorying your equipment, you can create waybills and car cards for operating sessions. Below are a couple of screen shots of the program’s inventory input sections.

updatefreightupdatelocomotive

Creating Car Cards and Waybills
One way to simulate real railroad operations is with car cards and waybills. Each car you own has a printed card with a photo of the car, car number, type of car and who owns the car. This card is folded to create a pocket to insert a waybill. Waybills describe what type of merchandise the car is carrying, where it came from, what its destination is and the type of car that is required. Below are examples of a card card for Milwaukee Road hopper #100285. The first photo shows a waybill for the car with no load (EMPTY). The car will travel from the staging yard in Harlowton to Montana Elevator in Geraldine. Once the car arrives at Montana Elevator and is loaded, the yellow waybill is moved to the back to reveal the next waybill. This waybill (which is actually the wrong one) shows the car destined for the Cargill grain export in Seattle, Washington.

IMG_0442IMG_0443

The main idea is that every train will have multiple car cards showing the destination for those cars. As the train reaches that car’s destination the car is set out at that industry and waits for the next train to come along to pick it up. This creates a realistic movement of cars across the layout. In the first photo below you can see how the cards are clipped to the front of the layout next to their destination. The second photo shows the box used to store car cards and waybills that are not currently on the layout.

IMG_0439IMG_0444