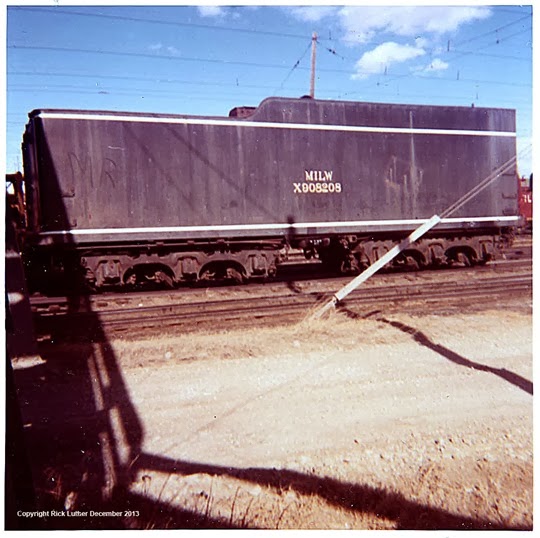
Converted tender used for water transport. Photographed in Harlowton, Mt. Summer 1974

Montana Grain Elevator Completed
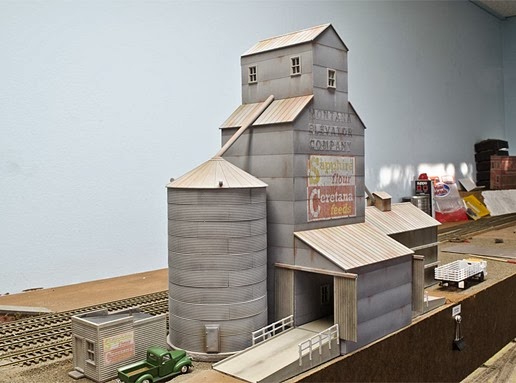
Montana Grain Elevator is finally completed. I received a 30’ Rix grain bin for Christmas. The only problem was, I needed it to be a 44’ bin. Good thing the internet is so handy. Within a few weeks the 11’ extension kit arrived. A feed pipe from the elevator head house was cut to the proper angles and attached to the top of the bin. Then a concrete base was cut from high density foam used in the RC hobby. This material is easy to cut and can be sanded to final shape. The bin received a gray primer paint coat and appropriate weathering consistent with the rest of the structure.
Click on any photo for a larger view

On the elevator office, I added a sign for the Sapphire Four and Ceretana Feeds. This the same sign that appears on the side of the elevator. The sign was created in Adobe Illustrator and resized for the side of the office. Then I printed the sign on normal paper on an ink jet printer. After the ink had dried I gave the sign a light coat of Dullcoat to seal the ink on the front. The paper then flipped over and the back sanded with a fine grit sand paper until the ink started to show through. The sign was then cut out and adhered to the side of the building with Mod Podge. The office received a final round of weathering with acrylic paint and powders. A good video for attaching signs to building can be found here on YouTube. “How to post up posters”
New Cattails for Creek
While attending the Ophir, Tintic and Western Train Show at Thanksgiving Point, I found these cattails from JTT Scenery Products. The new cattails are in the photo on the left. The old cattails in the photo on the right are from SceneMaster Botanicals. They are laser cut paper that you fold up into the final shape. While they are nice, they are not as realistic looking as the JTT cattails. Installation is as simple as drilling a hole and inserting them into the scenery. The JTT cattails are a few dollars more in cost, but are well worth it.
A New Locomotive for the Northern Montana
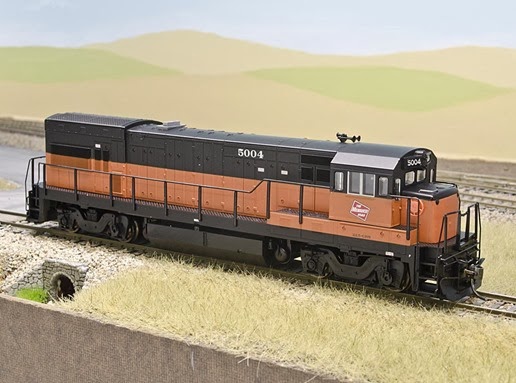
Another new edition from Christmas was this Atlas U23B from eBay. The Northern Montana Line is dominated by EMD locomotives. The list includes F7A, GP7, SD7, GP30, SW1, GP38 and an MP15AC. Waiting in the wings for a decoder is an Fairbanks Morse H10-44. So it was time that GE was represented on the layout. “U-Boats” were never assigned to the Northern Montana. They did make it as far west as Harlowton. They were usually brought in from the east on the trans-continental trains heading to the west coast. At Harlowton they were cut-off at the start of the electrified district. The “trans-con” trains were then handled by “Little Joes” and EMD diesels until the end of the electrified district at Avery, Idaho. Since it is possible that do to motive power shortages, a “U-Boat” could end up on the Northern Montana. I figure it’s my railroad, I can do what I want! The U23B in the photo below has had the decoder added and is ready to begin service. In the future, I will add details such as a strobe light, fire cracker antenna, all-weather cab windows and electronic bell. At this point I don’t have all the parts needed to complete the task. Once all the details have been added the engine will get some touch-up paint and a nice weathering job.

Modeling Operations in Winter Weather
As a “railroad” modeler, I am interested in how the real railroad handled various aspects of the operation of their railroad. I seldom see or hear about modeled snow plow trains. People build all kinds of maintenance-of-way equipment that sit static on their layouts or on a shelf, but do they model the operational aspect of this equipment. I have always thought that during the weather conditions in real life should reflect on the operation of the layout. If the area you model endures a severe winter storm that would be the time to limit traffic until the snow crews have had a chance to clear the line. Below is a photo of the plow that was used on the White Sulpher Springs & Yellowstone Park Railway. This line was a short branch line from the Milwaukee mainline at Ringling, Montana to White Sulpher Springs, Montana. It now resides at the Milwaukee Road Historical District in Harlowton, Montana.
I purchased IHC’s Milwaukee snowplow as a starting point for my snowplow. You can find these at local shows or on eBay. A check of IHC’s website does not show it available for purchase from them. While this is not an exact representation of the one pictured above it would serve my purpose for a plow train.
Click on a photo for a close-up view.
The first task to be completed was the removal of talgo style trucks and add a set of nice metal wheel trucks from Athearn. IHC uses a large diameter hole and pressure clip to keep the trucks attached. I filled-in the hole in the bolster with piece of spruce from scrap that I hand on hand. After the glue had dried, I drilled and tapped a new hole for a 2-56 screw. The new trucks attached easily and worked beautifully. As for the rear coupler, thankfully IHC had planned ahead and left a small diameter starter hole for adding a Kadee coupler box. I drilled and tapped a hole for another 2-56 hole and added a #5 for the back coupler. Again, another thanks to IHC for making this a simple task. The coupler matched perfectly with the coupler height gauge.
Click on a photo for a close-up view.
A feature of these plows is the ability to add lighting to the headlight on the top of the plow blade. I considered adding a wiper blade system to the trucks to power the headlight from track power. This seemed like an extensive task for something that would only be used occasionally four months out of the year. I noticed that the simulated concrete weights in the back of the gondola appeared to be about the size as a AAA battery holder from Radio Shack. After a few quick measurements, it was a perfect fit. The only thing that needed to be modified was a weight removed from the bottom of the car to make enough clearance. I used a 1.4mm 1.5 volt lamp from Circuitron that I had in the parts box. Add a SPST switch to shut off the light and you're done.
Click on a photo for a close-up view.
This project would not be complete without giving the plow some “character”. Using acrylics and chalk, I weathered the plow to show age and hard usage. I added only a little weathering to the the blade since that was probably better maintained then the rest of the plow.
Click on a photo for a close-up view.