Wednesday, October 23, 2013

Layout Construction - Update #9

Changes to the Helix Entrance and Swing Bridge
Construction of the tunnel portal at the lower helix entrance finally began. This will act as a view block to helix. I decided against building a tunnel liner to allow easier access for derailments. It does kind of ruin the illusion, but easy access sometimes should trump realism.

Click on the photos to enlarge them.

DSC_0015_1DSC_0014_1

I added ballast and static grass to the swing bridge area. That area will not receive much detail. A few bushes and possibly a small tree or two and maybe some telephone poles. The movement of the bridge will prevent much detail. At least it doesn’t seem so naked anymore.

DSC_0013_1

Layout Construction - Update #8

The Milwaukee Scale House
Scale houses were common at terminal/yard tracks along the Milwaukee mainline. I have not been able to verify if Great Falls had a scale house at Falls yard or elsewhere in the area, I’m sure they must have, just no proof. I do have photo documentation of a scale house next to the yard in Lewistown. Unfortunately there is no room in my Lewistown yard for a scale house. I do however have room on the Farmers Union grain elevator track next to Falls yard on the layout. Walthers has produced a kit with two types of scale houses based on Milwaukee Road designs. The hard work has been completed for me. For now I am using the single track design. In the future I plan on building the scale by-pass track.

Click on the photos to enlarge them.

Scale House in Lewistown Yard-1978DSC_0072_1

DSC_0074_1DSC_0076_1

Layout Construction - Update #7


The Cows Are Finally Coming Home

Martinsdale1


The Northern Montana Line was known for hauling a great deal of wheat and other grain commodities from Montana’s “Golden Triangle”. Up until the mid 1960’s cattle was another commodity that was prevalent on the NML. Even though cattle by rail had stopped during the period that I am modeling on the NML, it is something that I remember well. Growing up along the Milwaukee mainline you would see stock cars in many trains. The photo above was taken from the top of loading gates at the stock yards in Martinsdale, Montana. On the day this photo was taken there were six stock cars waiting to be loaded. The cattle had yet to arrive, so I had free rein of the yards and stock cars. Memories…

My version of the Northern Montana Line will have stock yards located at Denton and Geraldine. Most cattle shipments will be sent to Great Falls where there was large cattle exchange/auction. The Great Northern and Milwaukee supplied cattle to this industry. The cattle pens for Denton and Geraldine will not be to difficult to build. Walthers stock yard kit will produce pens for each town. Stocking these pens with cattle could be expensive. Woodland Scenics makes a nice set of Black Angus cattle. The only problem is out seven pieces only five represent mature cattle for market. While my stock pens are small it would be cost prohibitive to fill with Woodland Scenics sets. Ebay to the rescue! I found company in China that sells a large bag of unpainted cattle for about $25. With a little trimming, paint and time I can fill those stock pens with ease.

Click on the photos to enlarge them.

DSC_0184_1DSC_0187_1
              Tools and supplies ready!                                    Six poses. The horns will have to be trimmed.

DSC_0189_1DSC_0191_1
                   Ready for painting.                                     The purple cow is in honor of Seth Goddin’s book.

DSC_0194_1DSC_0202_1
Home made vs. Factory made

DSC_0199_1

Layout Construction - Update #6


1035463_f579857005_z
Where has the time gone?
I told myself that I wouldn’t let the blog slip into history this year. We’ll so much for keeping promises to myself. It is October and I am on a “forced” vacation. What I mean by “forced” is that we travel once a year to Island Park Village Resort to use our once a year week. The Resort is part of a time-share that we purchased from my in-laws. It is a use it or lose it situation. If you don’t use it you still have to pay for it. Anyway, that’s the reason I’m writing now. The reason I haven’t been updating regularly is ONE: Pure laziness and procrastination. TWO: Work and other activities. Work, unfortunately I have little to no control over. Other activities have been through the local model railroading club (Utah Society of Railroad Modelers) and the Northern Utah NMRA division. I regrettably have cut out most of the club and division activities until work settles down. Hopefully soon! On to the fun stuff!

Playing Mother Nature
Since I built the static grass tool, I have used it only a few times. The following photos show the Denton area where I have filled in a lot of areas around the new depot and in-between tracks. I am using a custom blend of static grass from Scenic Express. The two colors I use are 2mm, 4mm or 6mm Autumn Green and 6mm California Gold. Why so many different sizes of one color? A batch of grass is created when I’m ready to add it to the layout. Each time I mix a batch I will use a different size to create variation in the overall texture. At times I will add more of one color to add more variation.

Click on the photos to enlarge them.

DSC_0078_1DSC_0082_1

Modified by CombineZPIMG_4

DSC_0040_1_1DSC_0042_1

Creating Your Own Grass Tufts
I wanted the random tufts of grass to closely match the larger areas of static used elsewhere. Especially in areas like the dirt road and in-between ties. Since the color of grass is custom, I need custom tufts to match. I heard on a podcast that someone made their own tufts by using non-stick aluminum foil. These tufts are made using slightly diluted white glue. If the glue is diluted too much it will bead up into small puddles. Sometimes that is not a problem, but if you want a longer row it can be difficult.

Click on the photos to enlarge them.

DSC_0069_1DSC_0070_1

Saturday, February 16, 2013

Layout Construction - Update #5

Geraldine Handcar Shed
Just a short post this time. After completing the Denton station, I decided that a smaller project was in order. I had purchased the Pikestuff Handcar Shed (Stock No. 541-0006) more then a year ago. It had ended up in the box of "Future Projects". I HATE this box, but every modeler seems to end up with one. For some modelers it may not be a box, it maybe a shelf, a cabinet or some other storage device. You all know what I'm talking about. The "I'll buy it now and finish it later" box. My real concern is that I buy something with good intentions, but never seem to get around to building or using what I purchased. Oh well, if it were not for these boxes there would be fewer tables and less bargains at swap meets or train shows. Enough with the soap box (pun intended).


Construction is very straight forward and would be a great kit for first-time builders. A styrene based kit that requires only a few tools and glue. I followed the basic construction of the kit. I painted the shed the same primer gray that I used n the Denton station. The only difference is the lack of the darker gray lower color that the Milwaukee Road used on their stations. I surmise that a utility building did not deserve the extra cost for additional paint. I added shingles from Wild West Models and gave them the same green color as the Denton station. I feel it is very important to keep all the everyday railroad owns building a corporate look. A small bit of weathering, including a touch of rust to the door hinges and you have a nice structure with very little work or time required.


Saturday, February 9, 2013

Layout Construction - Update #4

Denton Station
The Milwaukee Road had a large variety of depot styles for their different locations. This variety was reflected on the Northern Montana Division. For this update I will focus on the depot at Denton, Montana. The Denton depot was considered a class "D-3" depot by the Milwaukee's Engineering Department. The depot was constructed in 1913 as the Milwaukee Road continued it branch line to Great Falls.


The construction of the Denton depot model was something that was already taken care of for me. Depots by John had created the model I needed for the depot. Unfortunately, the kit is now out of production. The kit is a simple resin construction with added details from other companies. Building the kit was really nothing more then about a four or five evening project. I added shake shingles from Wild West Models for an extra detail. The Milwaukee Road used a variety of colors for their depot, in the west region of the railroad they settle on a two tone gray scheme. The roofs were usually a green asphalt or shake shingle depending on the age of the depot. I stained the shake shingles from Wild West Models by using an olive green color art marker. Additional details will be added along with window glass. With the right amount of weathering you can turn a good kit into a great model!


Here are a few views of the depot in its natural setting.


Sunday, February 3, 2013

Layout Construction - Update #3

RDC-3 Budd Car - Great Northern #2350
When I was a child I participated in most things that young people do. Cub Scouts was a great adventure for a young man. One of the events of Cub Scouts that seemed to have an effect on my future as a model railroader was the day we took a ride on a train. That ride went from Great Falls to Havre, Montana. It was on Great Northern's RDC-3 #2350, a combination baggage and passenger car. The RDC-3 was built by the Budd Company of Philadelphia, Pennsylvania. Pictured below on the left is #2350 sitting at the Great Northern depot in Great Falls. The photo on the right is the #2350 after being retired it was spotted sitting at the Reading Shops in Reading, Pennsylvania during May of 1974. Left Photo Credit: Unkown - Right Photo Credit: TC Caughman, RailPictures.net


I knew that Proto 1000 had produced a Budd RDC-3 in Great Northern scheme, but I did not purchase it when it first came out. It was one of those things that you want but have to decide if you really need it. When I designed the current layout, passenger operations were something that never occurred to me. Then one night while searching eBay, I came across the #2350 up for bid. I knew I had to have it this time. With a little luck it was mine. I finally got around to adding a DCC decoder and LED lighting to the unit.

Here is a video on YouTube which shows the #2350 traveling from Helena to Butte, Montana.


Let the good times roll!


Layout Construction – Update #2


Falls Yard Update
Additional turnouts have been constructed to complete the mainline, passing and grain elevator siding along with the first yard track. I installed an additional crossover before the staging tracks to facilitate longer trains coming from or going into staging. In the last photo on the bottom right you can see the staging tracks have been placed on a removable section. While this section is not required to be removed to gain access to the crawl space, it will make it easier to move boxes in and out.

Click on the photos to enlarge them.

DSC_0059_1DSC_0033_1

DSC_0031_1DSC_0030_1

Saturday, February 2, 2013

Layout Construction – Update #1


Falls Yard Construction
With the roadbed in place, it is now time to build switches. The best system I have found for constructing switches is from Fast Tracks. Their jig makes switch construction fast and reliable. The more you build, the faster you complete one and better they turn out.

Pictured below is the small work bench that I use to construct  the switches. Nothing fancy, just a comfortable place to work.  On the right photo you can see the jigs from Fast Tracks and the start of a new switch. These are a number six jig.

Click on the photos to enlarge them.

IMG_0094IMG_0096

Below you can see the results from several hours of work. All that is left to do is cut gaps for the frog and some clean-up of the soldering joints.

IMG_0097IMG_0101

The cross-over from the mainline to the passing track and yard lead have been installed in the left photo. In the right photo, the turnout to the GTA grain elevator is being tested fitted for correct placement.
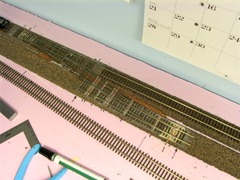
IMG_0104IMG_0107

With the grain elevator switch and the additional switch to the yard tracks in place, the main line and passing tracks have now been installed. You maybe wondering why there is the jog in the tracks for the siding, mainline and passing tracks. At the far end of the layout I need to deal with a water pipe that can not be moved without a great deal of expense. My answer was to jog everything slightly to the outside and cover it up with the grain elevator complex.

IMG_0120IMG_0117

Back from the dead – February 2013


Where Have I Been for Almost the Last Year?
My how time seems to slip away so easily. I’m not sure why I stopped posting to this blog. In an effort to redeem myself, I will try to catch everything up to the current state of the railroad.

Keep your arms and legs inside the ride at all times and enjoy your stay at the Northern Montana Line Blog.

Here we go!

grave