Showing posts with label Rolling stock. Show all posts

Monday, February 16, 2015

Golden Spike - #2


Continuing the Journey

The six cars that are required for the Rolling Stock (Motive Power & Cars) section of the Golden Spike Award are finally finished. In this post, I’ll review the cars that I will be showing to the AP (Achievement Program) Coordinator for evaluation.

Car #1 – Ralston Purina Reefer Car

As seen in the last post this car has been updated with new grab irons, ladders, stirrup steps, roof walk, body mounted couplers, new trucks, metal wheels and weathering.

BEFORE

DSC_0099_1 (2)

IN-PROGRESS

DSC_0023_1

AFTER

DSC_0038_1

Car #2 – Milwaukee Road TOFC Car

The car began life as a standard Blue Box Athearn 50’ flatcar. Additions to this included new metal wheels, couplers, side guard rails, collapsible trailer hitch, bridge plates, Milwaukee Road 40’ trailer and weathering.

BEFORE

ATH50FlatCar

AFTER

DSC_0051_1

Car #3 – Milwaukee Road Snow Plow

This car started out as an International Hobby Corporation Snow Plow. I changed the the horn hook talgo trucks with regular trucks with metal wheels and body mounted Kadee couplers. In addition to the weathering, I added an LED to the headlight controlled by a switch and battery hidden under the concrete weights.

BEFORE

MilwSnowPlow

AFTER

DSC_0064_1

Car #4 – Milwaukee Road Stock Car

I have written about this car in a previous post. Not much was done to this car except the addition of metal wheels and heavy weathering. The previous post can be viewed by clicking this link: http://northmontanaline.blogspot.com/2014/08/layout-update-29.html

BEFORE

4704

AFTER

DSC_0154_1

Car #5 – Great Northern Caboose

This caboose was a project started many years ago when the only decent looking inexpensive Great Northern caboose came from Athearn. Your choices were either brass or craftsman kits from companies like Silver Streak or Northeastern. My abilities at that time did not justify either kit and my wallet could not justify brass. The Blue Box kit seemed like the best alternative at the time. I changed things on the caboose to try and match Great Northern prototypes as best I could. The list includes sanding the roof to remove the rivets represent the tar paper roofs the GN used. The running boards were replaced as they represent the Santa Fe design that the original model takes after. New ladders were fashion from stock material to emulate the standard GN practice. Molded on grab irons were removed and replaced by wire grabs including new roof grabs made from lift rings and wire. The brake stands were replaced with a more appropriate style and end railings were replaced with GN style gates with logos and stripes. Additional reflective square decals were added along with lanterns for the rear end. New couplers and metal wheels were changed out. Window glass was added to the interior. Finally came time for weathering to give the caboose its proper well loved look.

BEFORE

2001ATHCaboose

AFTER

DSC_0060_1

Car #6 – Milwaukee Road Log Car

This car began as an Athearn Blue Box 40’ flat car. Extensive modification has taken place to the body of the car. The floor was chopped out and replaced with shorter end pieces. a new cover over the center sill placed as well as angle stringers finished out the flooring. Piping for the brake rigging was added to the molded on brake pieces in the under frame. While not completely correct it does get the idea across. Additional steel weights were cut to size and glued into the center sill spaces. The stake pockets on the side of the car were removed and filled in with putty. The molded on grab irons were removed and new wire grabs were added. The log bunks are from Details West. Painting was done using a rattle can of Krylon red primer. Microscale decals for a box car were the closest I could find that match the prototype. The usual metal wheels, Kadee couplers and weathering completed the model. The simulated logs are branches from trees in my yard.

BEFORE

ATH40FlatCar

PROTOTYPE

MilwLog

AFTER

DSC_0098_1

DSC_0107_1

Wednesday, January 22, 2014

Layout Construction - #20

Montana Grain Elevator Completed
Montana Grain Elevator is finally completed. I received a 30’ Rix grain bin for Christmas. The only problem was, I needed it to be a 44’ bin. Good thing the internet is so handy. Within a few weeks the 11’ extension kit arrived. A feed pipe from the elevator head house was cut to the proper angles and attached to the top of the bin. Then a concrete base was cut from high density foam used in the RC hobby. This material is easy to cut and can be sanded to final shape. The bin received a gray primer paint coat and appropriate weathering consistent with the rest of the structure.

Click on any photo for a larger view

DSC_0011_1

On the elevator office, I added a sign for the Sapphire Four and Ceretana Feeds. This the same sign that appears on the side of the elevator. The sign was created in Adobe Illustrator and resized for the side of the office. Then I printed the sign on normal paper on an ink jet printer. After the ink had dried I gave the sign a light coat of Dullcoat to seal the ink on the front. The paper then flipped over and the back sanded with a fine grit sand paper until the ink started to show through. The sign was then cut out and adhered to the side of the building with Mod Podge. The office received a final round of weathering with acrylic paint and powders. A good video for attaching signs to building can be found here on YouTube. “How to post up posters”

DSC_0009_1DSC_0007_1

New Cattails for Creek
While attending the Ophir, Tintic and Western Train Show at Thanksgiving Point, I found these cattails from JTT Scenery Products. The new cattails are in the photo on the left. The old cattails in the photo on the right are from SceneMaster Botanicals. They are laser cut paper that you fold up into the final shape. While they are nice, they are not as realistic looking as the JTT cattails. Installation is as simple as drilling a hole and inserting them into the scenery. The JTT cattails are a few dollars more in cost, but are well worth it.

DSC_0004_1IMG_0065_1

A New Locomotive for the Northern Montana
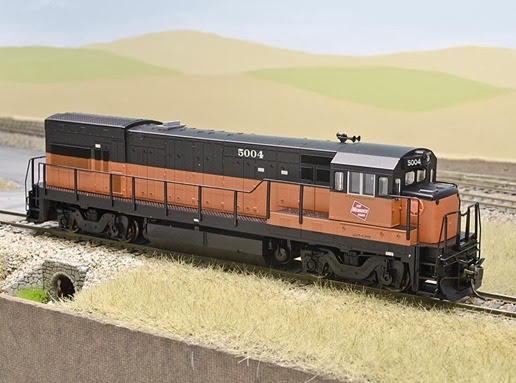
Another new edition from Christmas was this Atlas U23B from eBay. The Northern Montana Line is dominated by EMD locomotives. The list includes F7A, GP7, SD7, GP30, SW1, GP38 and an MP15AC. Waiting in the wings for a decoder is an Fairbanks Morse H10-44. So it was time that GE was represented on the layout. “U-Boats” were never assigned to the Northern Montana. They did make it as far west as Harlowton. They were usually brought in from the east on the trans-continental trains heading to the west coast. At Harlowton they were cut-off at the start of the electrified district. The “trans-con” trains were then handled by “Little Joes” and EMD diesels until the end of the electrified district at Avery, Idaho. Since it is possible that do to motive power shortages, a “U-Boat” could end up on the Northern Montana. I figure it’s my railroad, I can do what I want! The U23B in the photo below has had the decoder added and is ready to begin service. In the future, I will add details such as a strobe light, fire cracker antenna, all-weather cab windows and electronic bell. At this point I don’t have all the parts needed to complete the task. Once all the details have been added the engine will get some touch-up paint and a nice weathering job.

DSC_0014_1

Saturday, January 4, 2014

Layout Update - #19

Modeling Operations in Winter Weather
As a “railroad” modeler, I am interested in how the real railroad handled various aspects of the operation of their railroad. I seldom see or hear about modeled snow plow trains. People build all kinds of maintenance-of-way equipment that sit static on their layouts or on a shelf, but do they model the operational aspect of this equipment. I have always thought that during the weather conditions in real life should reflect on the operation of the layout. If the area you model endures a severe winter storm that would be the time to limit traffic until the snow crews have had a chance to clear the line. Below is a photo of the plow that was used on the White Sulpher Springs & Yellowstone Park Railway. This line was a short branch line from the Milwaukee mainline at Ringling, Montana to White Sulpher Springs, Montana. It now resides at the Milwaukee Road Historical District in Harlowton, Montana.

502911116_954eeafd1f_o

I purchased IHC’s Milwaukee snowplow as a starting point for my snowplow. You can find these at local shows or on eBay. A check of IHC’s website does not show it available for purchase from them. While this is not an exact representation of the one pictured above it would serve my purpose for a plow train.

Click on a photo for a close-up view.

DSC_0075_1_1DSC_0076_1

The first task to be completed was the removal of talgo style trucks and add a set of nice metal wheel trucks from Athearn. IHC uses a large diameter hole and pressure clip to keep the trucks attached. I filled-in the hole in the bolster with piece of spruce from scrap that I hand on hand. After the glue had dried, I drilled and tapped a new hole for a 2-56 screw. The new trucks attached easily and worked beautifully. As for the rear coupler, thankfully IHC had planned ahead and left a small diameter starter hole for adding a Kadee coupler box. I drilled and tapped a hole for another 2-56 hole and added a #5 for the back coupler. Again, another thanks to IHC for making this a simple task. The coupler matched perfectly with the coupler height gauge.

Click on a photo for a close-up view.

DSC_0090_1DSC_0099_1

A feature of these plows is the ability to add lighting to the headlight on the top of the plow blade. I considered adding a wiper blade system to the trucks to power the headlight from track power. This seemed like an extensive task for something that would only be used occasionally four months out of the year. I noticed that the simulated concrete weights in the back of the gondola appeared to be about the size as a AAA battery holder from Radio Shack. After a few quick measurements, it was a perfect fit. The only thing that needed to be modified was a weight removed from the bottom of the car to make enough clearance. I used a 1.4mm 1.5 volt lamp from Circuitron that I had in the parts box. Add a SPST switch to shut off the light and you're done.

Click on a photo for a close-up view.

DSC_0084_1DSC_0079_1

This project would not be complete without giving the plow some “character”. Using acrylics and chalk, I weathered the plow to show age and hard usage. I added only a little weathering to the the blade since that was probably better maintained then the rest of the plow.

Click on a photo for a close-up view.

DSC_0117_1DSC_0119_1

Sunday, December 1, 2013

Layout Update - #13

Another Rolling Stock Update
One of the industries on the NML is Fergus Gravel just outside of Geraldine on the way to Falls Yard. This industry loads hoppers and gondolas with ballast, rip-rap and other grades of gravel for various uses.

IMG_0058

The gravel pit is actually off the layout and accessed by a road that will go from the ramp to the edge of the layout. I have always liked the empties-in and loads-out part of operations. The only way to make it work realistically enough is with removable loads. Time to build some loads!

Removable Loads for Cars
After searching local hobby shops and the internet, I have not been able to find ready to use loads that have the look I want. Then it hit me! The NML uses ballast pulled from the Fergus Gravel pit. The loads should have a similar look also. I created the loads using the most common method that most modelers use. A pink foam base covered with your favorite material. While the one photo below with the load sitting on top of the car shows a lot of pink foam, once it sits down in the car it doesn’t show.

DSC_0029_2DSC_0018_1

DSC_0022_1DSC_0026_1

Wednesday, November 13, 2013

Layout Update - #12

More Rolling Stock Updates
The fabulous Lee Nicholas of the Utah Colorado & Western layout fame gave a great clinic on weathering cars quickly and easily using various techniques with acrylics and chalks. It was a good learning experience. What I found interesting is that not every car needs to be weathered as if were a contest quality model. Prototype railroad cars are just dirty. Some a little more than others. The idea is to get your rolling stock looking like models of working cars. Not just a bunch of cars fresh from the paint shop. This helps add to the overall realism of your layout. So, here are a couple examples with before and after views.

Click on the photos to enlarge them.

IMG_0174DSC_0031_1

IMG_0168DSC_0032_1

As you can see in these views, the photos on the left are taken with an older camera and the photos on the right are with my new Nikon. A good camera really does make a difference. Both cars received new couplers and metal wheels. While the change is not as drastic as you might expect, a little can go along way to the overall effect.

Time to Toot My Own Horn
To help raise some revenue for the 2013 Wasatch Rails Show put on by the Northern Utah Division of the NMRA, I was asked to create the artwork for a car they could sell. The decision was made to create a refer car for Wasatch Breweries “Polygamy Porter”. I love their slogan, “Why have just one!”. What could be any better to sell here in Utah. After receiving permission from the wonderful people at Wasatch Breweries, I set about to recreate the logo and develop the overall design. Accurail was commissioned to produce 48 kits. I think it came out very nice. All but one of the kits sold prior to show in November. I am sure it won’t be long before the last one is gone.

Click on the photos to enlarge them.

DSC_0016_2

Layout Update - #11


or How I Spent Time While on Vacation
Besides taking the time to update this blog, I planned on some evening modeling activities. Yes, I brought model railroading with me on vacation. It’s kind of like work, you never ever really get completely away from it. It is always there sometimes as a friend and sometimes as reminder of the things that you haven’t yet done. The nice thing about the model railroading hobby is that you can spend as much or as little time you want. It’s always there like an old friend waiting to say hello.

This year for our annual trip to Island Park, Idaho, I packed the tool case and three freight car kits that have been on the to do list for a long time. For the necessity of space and time, I choose three kits that would not require a great deal of work. Simple kits that could be easily assembled in one evening. Additional time will be spent in the future doing the final detail work and weathering. For now they are ready for use on the layout.

Click on the photos to enlarge them.

DSC_0013_1DSC_0008_1

DSC_0011_1

So you maybe asking yourself why a Louisville & Nashville car for a railroad in the middle of Montana? I have spent a lot of time viewing Milwaukee Road videos to see what types and whose railroads were part of train consists on the the railroad. As I watched the videos, I made notes of these other railroads for future rolling stock purchases. This list is taken with us when we attend shows. So remember, the next time you are out taking a video of a train, video the whole train. Not just the locomotives. In the future someone will be needing to do some research for this era!

Friday, December 2, 2011

Wasatch Rails 2011 – November 2011

The First Show of the Model Railroad Season
The leaves have fallen from the trees and the temperatures are dropping, but you really know it’s fall when the announcements for model railroad shows start to appear. The first show of the season is the Wasatch Rails in Salt Lake City. This year was a good gathering of fellow modelers. The show is sponsored by the Wastach Division of the National Model Railroad Association (NMRA). There was a good selection of layouts and vendors. A new feature this year were clinics sponsored by the Utah Society of Model Railroaders. The clinics included weathering, soldering, foam scenery construction and a Boy Scouts Merit Badge. I attended several of the clinics and thoroughly enjoyed myself.

Wasatch_Rails_2011WNMRA_lg2011_618x499

Show Treasures
As always, you can’t pass up some of the great deals you find at these shows. This year was no exception. Among the treasures were several more cars to add to my collection. A Milwaukee Road box car and a hopper car.

IMG_0099IMG_0101

For the layout, I purchased a chain link fence kit which will be used for the oil depot at Lewistown and the Heath gypsum plant. I also procured several switch stands to be used in Falls yard when that area is finished. All in all, a very enjoyable time.

09330000003125DSCN2163

Friday, March 11, 2011

Train Show – March 2011

The Hostlers Model Railroad Festival is the largest show of the season. This year was better than ever. There were more vendors and displays then in past shows. New vendors from outside of Utah included Colorado, Nebraska, Idaho and more. The manufacturer, Exact Rail from Provo, had a small display both to answer questions about their products. We spent all day at the show looking at everything and I attended one clinic. If there was only enough money to match the products I was sure that I needed.

hostlerfest2011

page47-1026-fullpage47-1027-full

page47-1040-fullpage47-1008-full

An short video about some interesting animation of a dump truck. Might be something I’ll use.

Here I am attending a clinic about the proper weight for rolling stock. Free and very informative.

page47-1035-full

I made out like a bandit with all the products available from vendors. Or, did they make out like a bandit from me? We were able to cross off several things off our “Scavenger List” and add things that were never there. The last photos of the painting truck and crew will make a nice story scene for the farm house.

IMG_0107IMG_0115

IMG_0110IMG_0112

IMG_0116IMG_0103

IMG_0105IMG_0099

AS5539_f_1DCF 1.0